Today I want to touch on something a little different. Photographing people in abandoned spaces, and using composite techniques to put previously shot portraits into abandoned spaces.
Photographing abandoned spaces is a love affair for me. I find peace in the erie silence; and the untold stories of the people who lived, worked, and worshiped in these places sets my imagination on fire. Recently an invite only gallery exhibit that I was asked to participate in, got me thinking more about portraits in abandoned spaces. I'll admit it; between the insanity of my life and the cold weather outside, completing an entire exhibit of abandoned portraits was too much to take on. But there are ways around that.
Lets start with the assumption that its not 6 degrees outside, babysitters are readily available, and my model shows up on time and ready. Shooting people in abandoned places can be very complicated. You have to worry 1st and foremost about legal aspects. Are you allowed to be there? If not, well then you have to deal with the age old urbex talent of sneaking onto the property and this time, bringing a model with you. Not always easy to do. You have to worry about being caught...which means most times you can forget about strobes. Nothing says "Someone is in here" like flashing lights being seen from the road.
You also have to deal with the issue of what the lighting situation is in the location. Locations that are "mothballed" or closed up completely (bricked or boarded) are going to be very dark. Other locations might be so open that they are brighter than what you want for your shoot. Yup...it can get complicated quick. That being said, it doesn't HAVE to be complicated. A 5 way reflector can be a great investment if you don't already have one. Strobes and slaves and soft boxes are great for certain types of shots but you can make amazing portraits without them too.
So lets get down to it.
I'll start you off easy. Available lighting. Available lighting can make dramatic portraits in a number of ways. Back-lighting has been and always will be a favorite for me. In the two shots just below, the model was standing just a few feet inside a doorway. The doorway was a large arched door (as you can see in the lower right corner of the shot. The main doors were somewhat boarded up, basically had plywood propped against them. The window structure at the top was wide open but the light was not coming directly in, so this created a nice soft light.
In the 1st image, I did nothing. It was a straight on photograph. I positioned her so the light was rimming her side just enough to give a glow to the mask and the curves of her torso...and bang. Photo taken, done and done. Now, my background is documentary work and I had a nazi of a prof in college (Doc Photo 1) that was a stickler for watching the edges of your frame. In my world, cutting off the top of heads, points of elbows, or fingers/half of hands/feet is inexcusable and a sign of someone who is not experienced enough to focus on all aspects of what is in front of them. There are times that you may choose to cut something out of a shot intentionally, but with models edges are important. This doesn't just apply to the model themselves. It also applies to the surroundings. I like the darkness in the upper right corner. In this first shot, the model was standing on the stairs. It would have taken 2 seconds for me to walk up one step and avoid that darkness in the shot by reframing. But I feel that in this shot, as dark as her face and body are but as light as the background is, the darkness of the hall above her and the slight darkness of the railing to the bottom left help to ground the subject (or tie her into the background more).

In this next shot, the model is down off the stairs standing just behind where she was in the above image. The light bounced off the stair way and wall creating a natural soft box effect. To add to the intensity that her facial expression, the cracked background, and the gas mask give, I used Photoshop to dodge her eyes just a touch to make them really pop and to add a little bit of a "zombie/creepy" look to them.
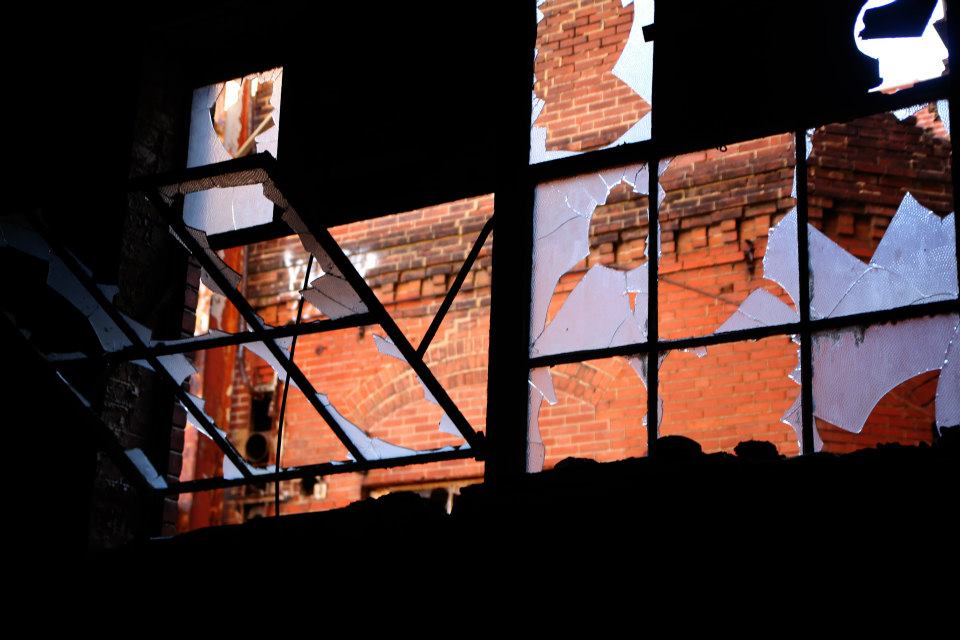
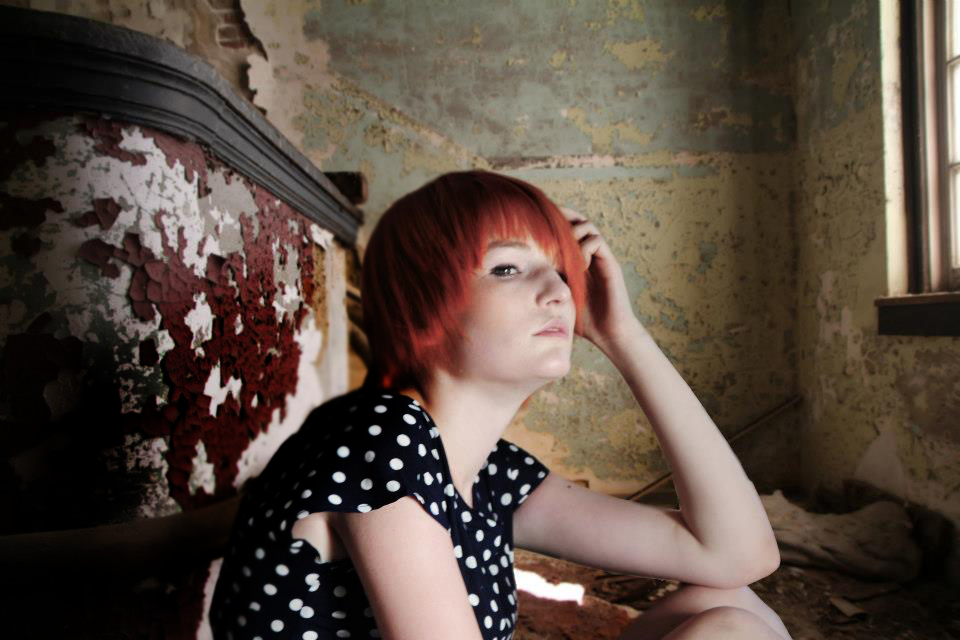
The next image is also shot with available lighting. This shot was done in a church. The light streaming in was coming from a very warm toned stained glass window (seen below the portrait). The original portrait was very warm toned. With a simple few steps in Photoshop (adjusting color balance and cutting down the contrast) I gave the model a cool tone that plays off the blue window behind her, and evens out the harsh shadows that the late day light was creating. Use of a couple of layers helped with this process.
.jpg) |
Window which provided light for the mask portrait above
|
So on we move to more fun stuff. This is pretty self explanatory. Its an exterior shot with an abandonment in the background (one of my favorite places...a historic home that is owned by a really cool guy who locals claim is a psycho...go figure I would make friends with a psycho). I will be completely straight with you. At the time that I shot this image, I was editing on my ipad. My computer was on the fritz and my laptop was not with me. This shot was edited using the app called Snapseed. Bump on the saturation, blur the edges and darken. Done and done. Like I said, it doesnt have to be complicated.
Now, as awesome as natural light and being there can be, the fact is that sometimes it doesn't go down like that. There are many reasons that an abandoned/urbex photographer may not be able to get a model to an location for a portrait session. We touched on some earlier...if you weren't paying attention, go back to the beginning and read this all again. No. Really...do it. MOVING ON!
Using old images can often times work. You have to be mindful of the strength, tone, color, and direction of light in both the portrait image and the background shot. In the shot below, I placed the image of the girl into the background image because the color tones and lighting were so similar.
If you are using multiple images to create a composite, you have to remember not only the items already listed, but also your point of focus. If your subject is against a wall that is blurry and she is sharp, you have an issue. Thus my problem with the image above. When finishing this shot, I DID go back and blur the line between her hair/back and the background...but I wanted to post THIS edit of it so I could point that out. That line is TOO sharp and make her look obviously cut and pasted into this background.
This is the image with that line blurred to help her blend into the background and added a little shadow in. NO the light isnt exactly perfect but this could easily have been lit by a reflector.
I will give you my tricks but I will also say right now that I JUST started learning and this is something that will have to be its own post in the near future. For now, the round about of it is this:
My pre-pics:
The portrait was shot with natural lighting from a window to the left, and a strobe bounced off the white ceiling to fill. By sectioning out the part of the portrait shot that I want to keep (in photoshop, using the lasso tool with a 3px feather) and doing a simple copy and paste you come up with this:
Again, in the next image, I simply chose 2 images that have similar light/similar directionality of the light and strength, and did lasso'd out the area I wanted to copy and paste. In this shot, I made sure to darken (using the burn tool) the area behind the model to create a shadow that matches the lighting direction from the window in the background image.
Onto the last of the bits I want to cover in this post; using artificial lighting in urbex type locations.
Now I will start this off by stating that the location of the next two images is NOT abandoned It is a historic home, currently under renovation. It's MY house. Built in 1881, a beautiful big property...in the midst of having plaster and lath removed to replace it with new insulation and dry wall...WHICH does pain me but will be great for my utility bills. This wall was intact before I shot this. We decided that with my antique wheel chair and the subject matter we were going for, the wall needed to be demo'ed at least in part, to mimic the abandoned locations we love so much. That said, we WOULD have gone out to a real abandoned place but its 16 degrees right now and well, look at how she's dressed. I wouldn't as any model to get frost bite. Lucky for me, I have a location that appears abandoned.

These images had 3 lighting sources to create the effect that I wanted. To the left of the subject is a large but low window. To the right and directly to my side was a tungsten hot light. And my camera had an off camera strobe with a soft box on it that was directly above my camera to ensure a clean light on the model's face. These two images came out exactly as I planned.
The last image is from a very dark location with no natural light (below ground level). This shot was done in almost no light using an off camera strobe. Nothing fancy, just a typical flash strobe. No Alien Bee, no $600 light set. Then in Photoshop, I made the model black and white. Easy Peasy!
MINIMIZE for urbex locations. Think in and out, thing hauling through holes of fences and down embankments. Think subtle, easily movable, quick set up and tear down, and keeping moving at a high rate of speed. Simple is best. You do NOT have to be a professional photographer, have to own thousands in equipment, or have lots of experience to create great portraits in abandoned places. Get out there, shoot and keep moving forward with your work and skills. And as ALWAYS...you are all welcome to message me for more info an help. I love helping other photo and urbex lovers take their art to the next level!
-A
.jpg)


.jpg)
.jpg)

.jpg)
.jpg)
.jpg)